Painting a Sphere with 9 Value Scale
- Feb 11
- 3 min read
In previous blog post of the value scale exercise, we had painted a simple cube, using the 9 value scale.
In this part we will paint a sphere and understand the components of light and shadow as we paint.

Lets take a min to understand the light and shadow on this sphere.
First identify the direction of the light, here it is from the top left
We have the terminator line, where form transitions from light to shadow.
In the shadow part we have the form shadow on the sphere itself, and it casts a shadow on the surface as well.
The darkest part of the shadow on the sphere is called core shadow.
At the bottom we have the reflected light bouncing from the surface.
And the last shadow shape is the occlusion shadow., while the core shadow is the darkest one on the sphere,
the occlusion shadow would be the darkest one in the overall picture as the light doesnt reach this area.
On the light side, we have the highlight, Its the reflection of the light source. and its brightest spot in the picture.
Then we have the centre light which is the plane facing the light.
And as the form turns we have the halftone which is the middle value between the light side and shadow side.
Alright, now that we know the terminologies, lets assign the appropriate values to them and paint the sphere.

I am using a 9 value scale by Denman Ross. You can print and refer to my color wheel and value chart, to get the value scale for comparison.

I have a 8 x 6 canvas paper here, toned with raw umber and have the 9 values premixed on the palette.
I have used a size 2 flat brush for the sketch. The sketch doesnt have to be perfect as we can refine the shape as we paint.

Starting with the cast shadow, I am using black paint. Using the dark value for the form shadow. Just blocking in the shape for now.

For the area in light I am creating a transition from high-light, light, low-light to mid.
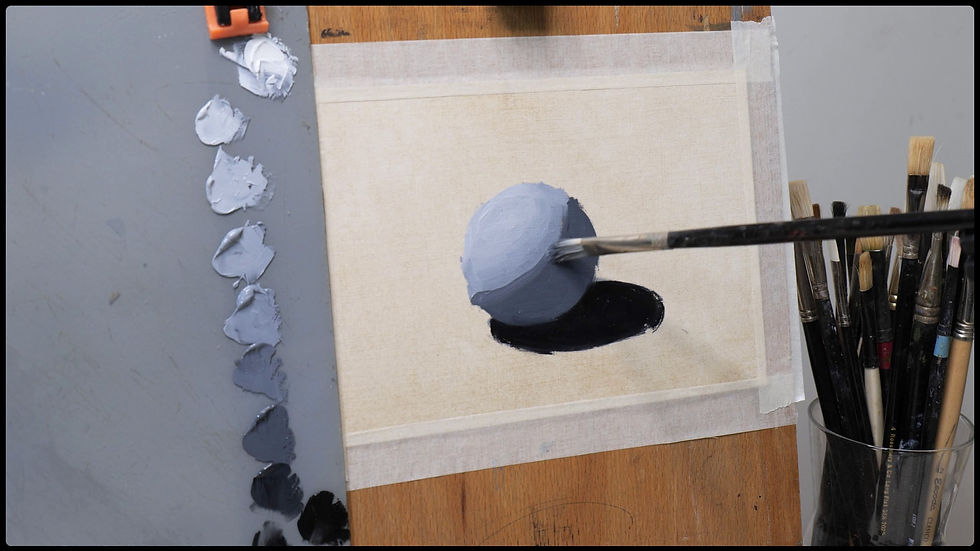
Using high-dark to soften the terminator edge. When you are blending two areas which have bigger differece in value, instead of blending directly on the canvas, use a in between value to blend, it give a more painterly look instead of the smooth airbrush kind of look if you mix directly.
Here i am adding the core shadow using low-dark. This is the darkest shadow on the sphere.

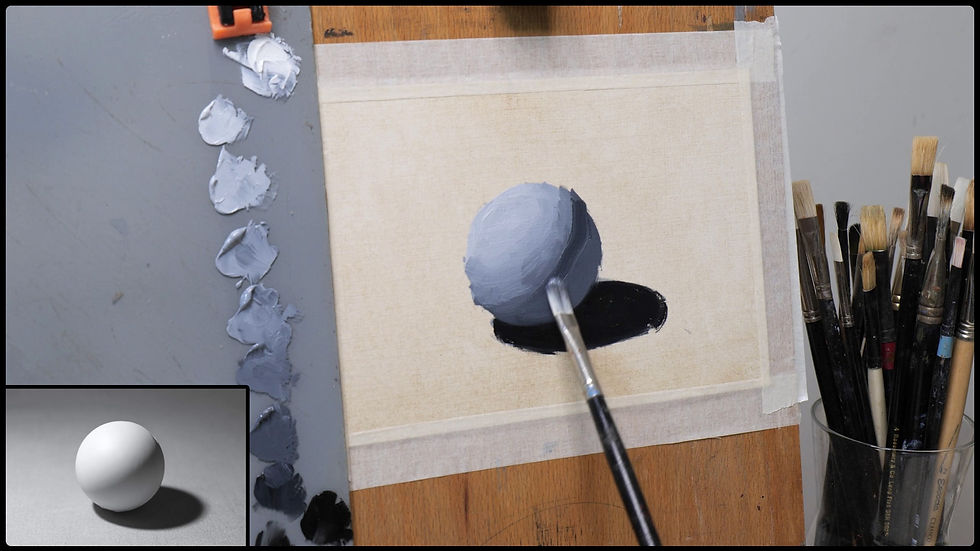
Adding the reflected light at the bottom with a lighter value in the shadows. Some of the surrounding light affects the outer section of the cast shadow, making it a bit less dark.

Finally adding the highlight, using the white to mark the spot. And softening it, so it doesnt look very shiny.

I am painitng the background now, using a bigger brush to quickly fill in the canvas.. And I will use the brushstrokes to refine the roundness of the sphere.

This simple value study of a sphere might look basic, but it is an important exercise to paint light realistically.
If you can paint a sphere like this, you’re already learning how to paint anything.
If watching this helped you, try this exercises yourself. And If you liked the post, you can subscribe for more such tutorials.
YouTube Video:


Comments