How to Clean Oil Paint Brushes
- shreyasfineart
- Aug 21, 2025
- 4 min read

Nothing’s worse than picking up a stiff, ruined brush before you start painting. I had ruined many brushes in my initial days of oil painting when I was still new to how oil paint works. Now that I have enough experience and trial and errors on brush care, let me share some simple yet effective ways to clean your oil brushes so they stay flexible, sharp, and ready for your next painting.
Cleaning Materials
You will need
Solvent like turpentine or mineral spirits
A container with strainer to hold the solvent
Oil (eg linseed, safflower or any painting oil)
A bathing soap (beginners) or an Artist's soap (advanced painters)

Step - 1: Wipe excess paint
The first step is to wipe off the excess paint with a cotton rag or paper towel.

Step - 2: Clean brush in solvent
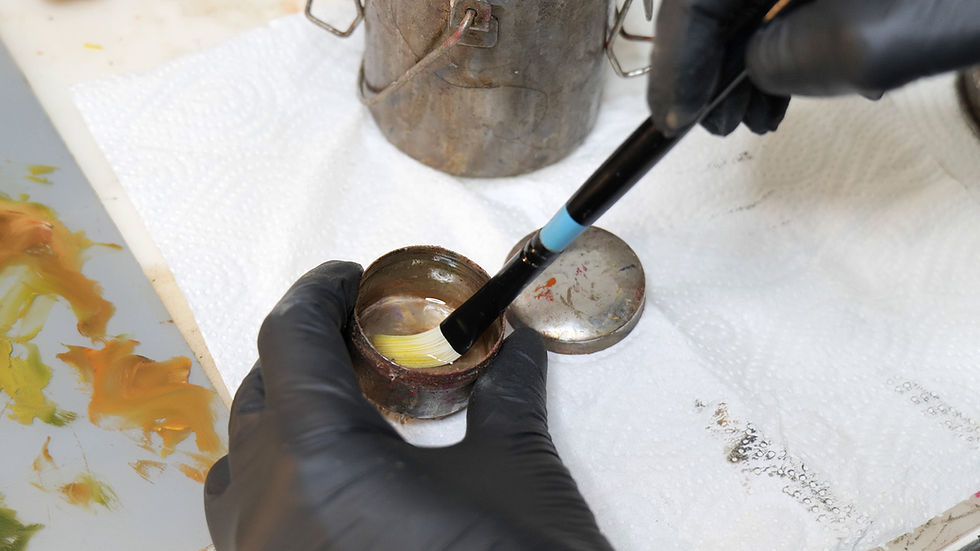
Swirl your brush in solvent, pushing and dragging the brush gently. Bend the bristles so they are completely covered in solvent, Ensuring any paint at the base of the ferrule is also dissolved.
Then wipe it with cotton rag or paper towel and repeat this a couple of times. This step will remove most of the paint quickly.
If you can use traditional turpentine or odourless mineral spirits if you have issues with turpentine fumes.

Step - 3: Wash brush with oil and soap
for the next step, I have got you two options:
Option - 1: With just oil and regular bathing soap, for beginners
Option - 2: And for the serious painters, a dedicated oil soap, which can cost a bit.
Option - 1: Oil and Bathing soap
Dip the brush in oil, covering the bristles. The oil helps loosen and dissolve any leftover paint.
If you want to clean the brushes without a solvent, you can just use oil but it may require multiples passes to get most of the paint out. Having a second container with cleaner oil will get more effective results

Now to the basin, wash the bristles with soap and water, any mild hand soap or baby soap works fine. if you can find any which has oil as an ingredient, like olive oil soap, still better.

Gently massage the bristles, working the paint out along the length of the bristles. Rinse in water, re-apply soap and repeat the process a few times until there is not visible paint residue.

Avoid scrubbing the brush around, it may damage the bristles.

This method uses things you probably already have at home, but it requires an extra step of oiling the bristles and a regular soap may have some abrasive ingredients.
Option 2: Artist's soap for brushes
Now, if you are more advanced painter using high quality brushes. I recommend investing in dedicated artist's soap. I use products like General's Master brush cleaner, which are specially formulated to be non-abrasive yet effective in removing paint from the brushes.

Here I am using a bar of Master brush cleaner soap which is actually marketed for hands to remove the paint, but it works equally well for brushes. The process is the same for cleaning, only advantage is you can skip the coating of oil stage as the artist's soap already has oil and specially formulated ingredients which remove the paint effective and also are mild on the bristles.

Below is the actual brush cleaner for Master's, which they marketed for brushes, its bit more expensive than the bar if you compare the weight. However, The washing process is same.
Artist Soap Bar: 42 gms
Brush Cleaner: 7.1 gms
Step 4: Reshape bristles
And as a finishing step, dry your brush on a paper towel and can coat the bristles with soap, reshape so that it forms a sharp edge, and allow it to dry. This will help to keep you brushes in good shape and repair any minor fraying or loose bristles.
Just remember to rinse the brush to remove the soap, next time you start painting.

Step - 5: Lay flat to dry
Always lay them flat after cleaning. Even after a proper clean, there might be tiny bit of paint of water in the bristles, placing them upright might them to seep into the ferrule and damaging the shape over time.

Bonus Tip: For short-term brush care
Ideally you should clean your brushes after every painting session. but I know that's not always practical. One trick is to coat the brushes at the end of the session with a slow drying oil (like safflower or walnut oil).
It will keep your brushes workable for a day or two, you can cover them with plastic wrap which can extend the drying time for few more days.

Conclusion
Taking a few minutes to clean your brushes properly will keep them in good shape. Your brushes are one of the most expensive tools in your painting inventory. Taking good care of them will definitely save you money in the long run.
If you want to know what brushes I use or in general guide to oil painting brushes, I already have a blog post for it, you can check it out Beginner's guide to Oil Painting Brushes


Comments